How to Start a Food or Recipe Blog
Many Ask: How Do I Start a Food or Recipe Blog?
Here's a basic Step By Step Guide.
There are many parts to a start a blog, from technicalities to design aspects to keep readers engaged and coming back. If you're just doing it for fun, some technical aspects might not be as important. On the other hand, if you're trying to become more successful making a little money on a side hustle, then all of the factors I'm about to mention come into play!
My guess is that you found this page because either you love food, or were looking for a recipe, or maybe your friends have kept telling you to start a blog so now finally you have decided to do some research on your own and ended up here...

Ready to Start?
Don't keep procrastinating. Now is the time to start your blog!
The longer you take, the longer it will take you to see results! Take the next few steps we're about to mention below, and you should be up and running with your blog in a snap.
The Main Three Steps to Food Blogging:
- Blog Name, Domain Name & Hosting
- Installing WordPress
- Making it Look Pretty with a Theme
Disclaimer: Please note that some of the links on this page may be affiliate links and we earn a small commission if you purchase through those links. We have tried some of the products and can recommend them since they have been helpful to us in the past, and they have gained our trust.
1) Blog Name, Domain Name & Hosting
Here is the driving force of your blog, like the engine of your car!
You will need to choose a domain name that suits you and your recipes well. Just some quick tips - try to pick a memorable name, be as short as possible, and finally one that's easy to spell. Also a side note, try to stick to a .com standard domain suffix, since most people remember it much better. What will your domain be?
Ours is crystalmixer.com. It's served us well, but it's always best to spend a little time going over different name possibilities, then take another day or so to overlook it, then finally decide what's best for you. That being said, don't think too hard about your domain, we used to do that a lot but have gotten over that habit. After you have thought of your top 3-5 names you would like, go to Bluehost to see if that domain name is available. We recommend Bluehost because they are reliable, affordable and they have 24/7 support. When you're there, you'll see something that looks like the following:
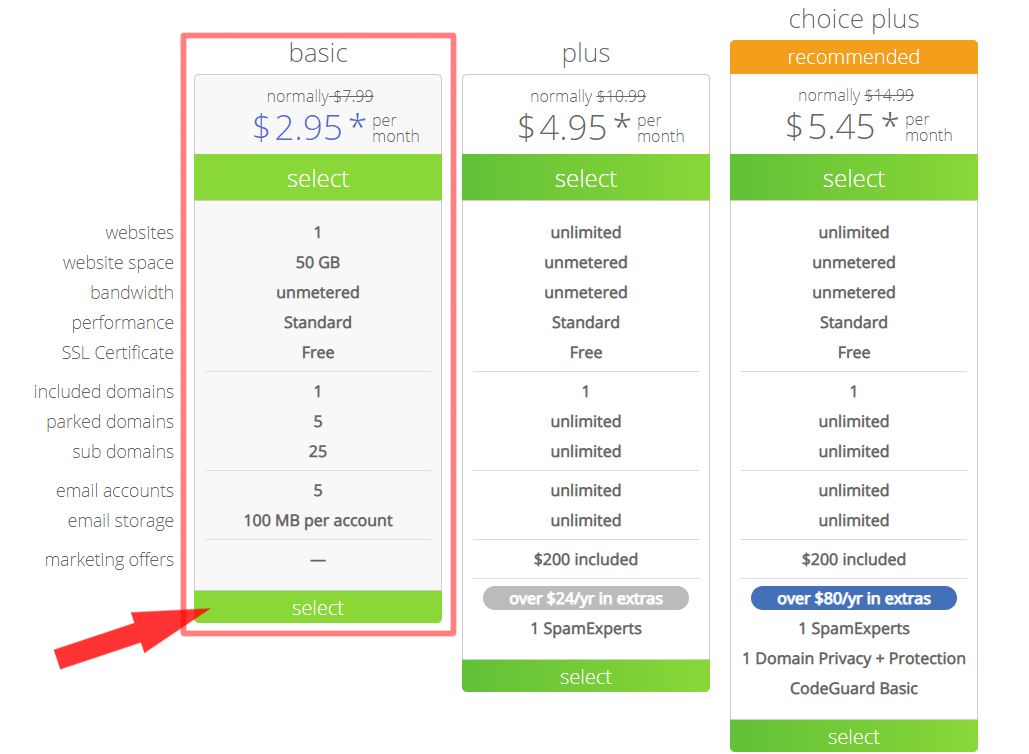
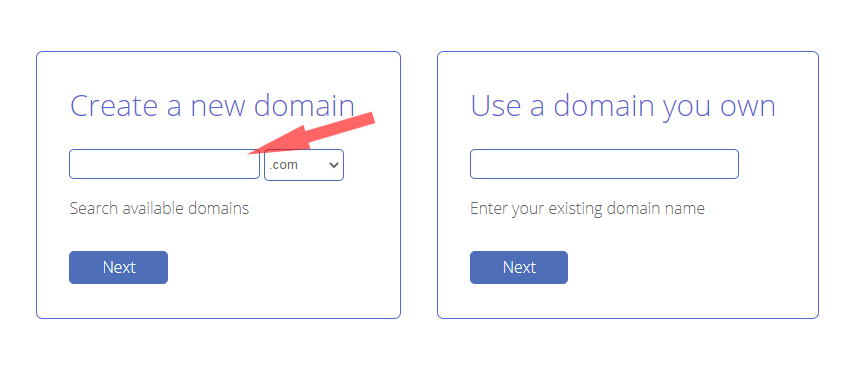 If it's available it will tell you, if not, you may have to spend a little more time picking another similar name which would work. Once you have come across an available domain, you will be asked to pick a hosting plan - we suggest you go with a Starter Plan, sure at first it may seem like a lot of money, but you pay once for a whole year, and in turn you also save a lot of cash when you do that vs paying monthly.
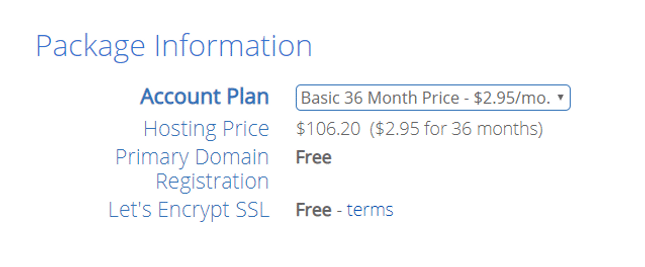
 Here is where things will begin to sound a little technical and complicated, but it's not that bad, that's why we have made this guide to help you. Hosting is a key part of putting your website or blog online - it's like renting space on a very powerful computer (server) on the internet to actually put your website online and connects your domain to it. For example, when someone goes to crystalmixer.com, they are actually going to the hosting computer (server), where the website is held (your website doesn't actually load for visitors from your computer in your home). Bluehost has awesome rates and pricing for a beginner and you also get a free domain when you host with them!
Everyone loves great deals!
Here is where things will begin to sound a little technical and complicated, but it's not that bad, that's why we have made this guide to help you. Hosting is a key part of putting your website or blog online - it's like renting space on a very powerful computer (server) on the internet to actually put your website online and connects your domain to it. For example, when someone goes to crystalmixer.com, they are actually going to the hosting computer (server), where the website is held (your website doesn't actually load for visitors from your computer in your home). Bluehost has awesome rates and pricing for a beginner and you also get a free domain when you host with them!
Everyone loves great deals!
2) Installing WordPress
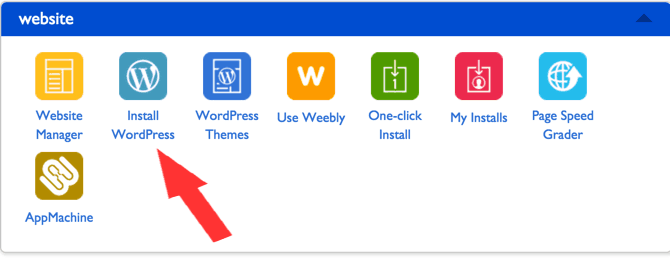
After registering and completing the setup with Bluehost, you will need to install WordPress.
WordPress is the blogging software which helps you actually make blog posts and edit your website as you need, without the need to hire a web developer for every little change. It's super easy, almost like editing in Microsoft Word. The best part about WordPress is that its FREE!
Here is how to install WordPress on Bluehost:
Login to Bluehost Cpanel Dashboard first, then click on WordPress icon under the Software / Services section, and you should find the WordPress Installer there.
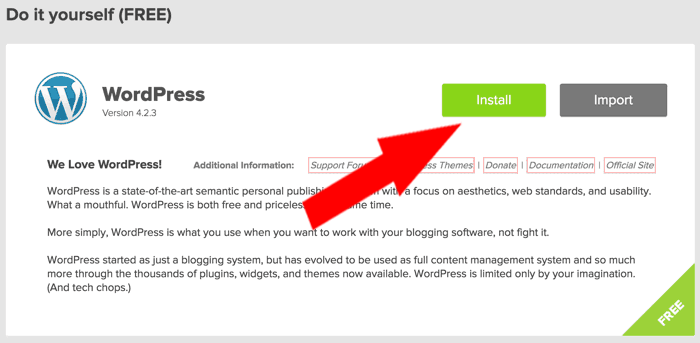
 After you press Install WordPress, on the following page click the "Install" button in green, which is found on the "Do it yourself FREE" section as below:
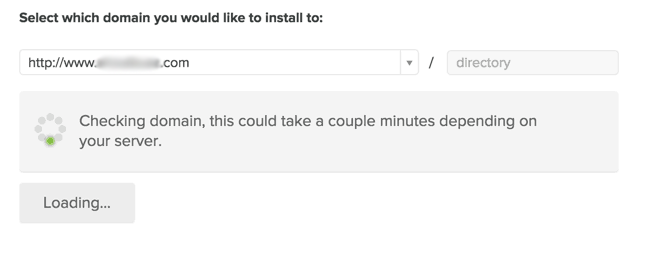
 On the next screen, Click the "Check Domain" button, to select the website domain you wish to install WordPress onto, then it will say checking domain to confirm your selection.
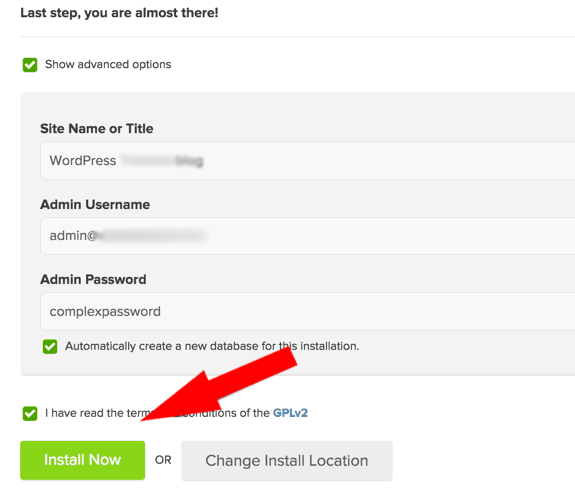
 This is the final step, this is where you name your website and create your administrator login information for your blog on WordPress. All of this information can be changed later if need-be so don't worry, but you’ll need them for your first time logging in. When you're ready, check the terms and conditions box and then click the “Install Now” button to actually begin the installation process.
 Once you get the message that says “Your install is complete!” then everything went successful, congratulations - your blog should be up and running!
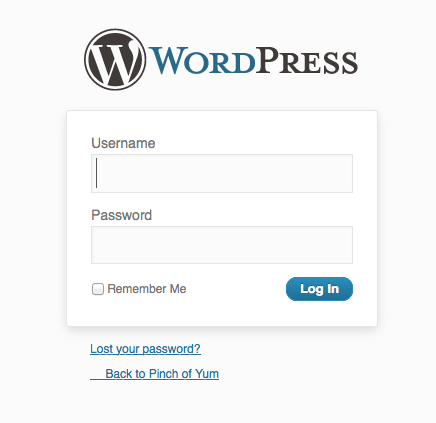
After that's completed, you'll want to log into your WordPress administration dashboard by going to your "Admin URL", the login screen looks like the one below. Here you enter the same username and password you entered in the previous step.
Once you get the message that says “Your install is complete!” then everything went successful, congratulations - your blog should be up and running!
After that's completed, you'll want to log into your WordPress administration dashboard by going to your "Admin URL", the login screen looks like the one below. Here you enter the same username and password you entered in the previous step.
 After successfully entering your credentials, you have finally logged into your blog. Congrats!
3) Making it Look Pretty with a Theme
If you made it to this point, then you already have your own blog setup! Ready? Welcoming to the blogging world!
From this point on it's about sharing all your awesome recipes and favorites with the world.
Before you get going, you may want to make your website blog look pretty, you do that by using a theme - it sets the "look" of your blog. The default themes are generally great for testing, but appeal factor isn't too wowwing. You can choose through many free themes from WordPress to begin with, or go with a premium theme such as these:
Recommended premium WordPress themes
- Elegant Themes - This is a great theme for a beginner blogger, which is very easy to use, and has a lot of options to suit your needs. Also would like to mention it's a bit cheaper than most premium themes. Browse around and see if it fits your blog well.

- The Genesis Framework - This is one of the best theme platforms for WordPress known for working very well and running fast, all while looking beautiful. If you like the Genesis Framework, you may want to check out themes from StudioPress Themes, they make some amazing themes for bloggers and recipe specific themes.
- Hire your own developer to create a theme custom tailored to your needs and requirements. Cost for such services can range from a few hundred dollars to a few thousand.
Some key items to remember when choosing a theme - no matter where you get your theme. The theme should be well designed, user friendly, responsive for today's mobile visitors (which account for over 70% of our visitors), optimized for search engines, and lastly they should provide support for the continuous changing technology on the web to make sure it stays compatible with your hosting, WordPress and other features.
Sign up for our newsletter for future updates and more blogging tips such as how to get more traffic with SEO (search engine optimization), best content creation methods, and finally monetization.
